Setting Up GitHub to work with Visual Studio 2013 Step-by-Step
Intro
I’ll admit that the easier you make something, the more I will use it. While I know enough about the command line to work with Github, I’d much prefer it to be integrated inside my IDE. In this tutorial, I’ll show you just how to do that using Visual Studio 2013.
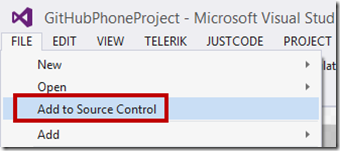
Begin by creating any type of project. In my case, I created a new Windows Phone 8 app. Again, this doesn’t matter. Select “File”->”Add to Source Control” as shown below.
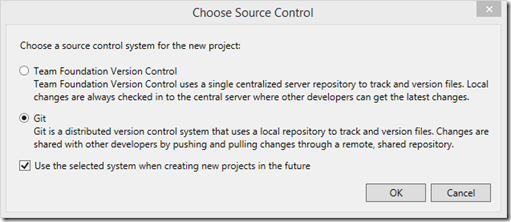
You will get an option to choose between TFS or Git. Select “Git” and place a checkmark to use it in the future.
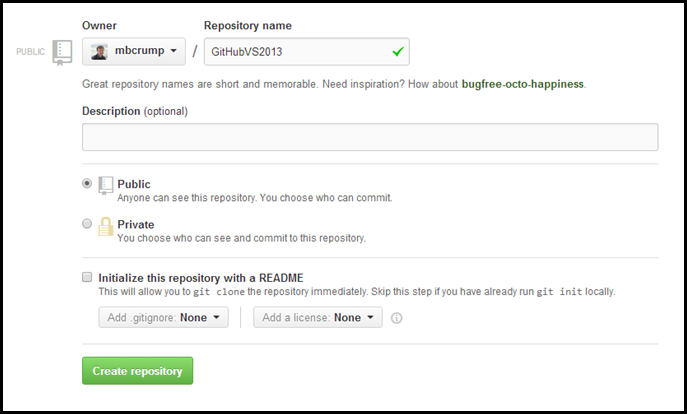
Head over to github.com and create a new repository and give it any name you want. I named mine “GitHubVS2013”, left the rest as default and finally hit “Create Repository”.
Go inside the newly created repository and copy the clone URL. You will need this in the next step.
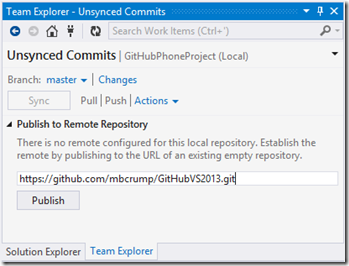
Beside the Solution Explorer tab, you will see Team Explorer. Click on “Unsynced commits” and add the clone URL from the step before and press “Publish”.
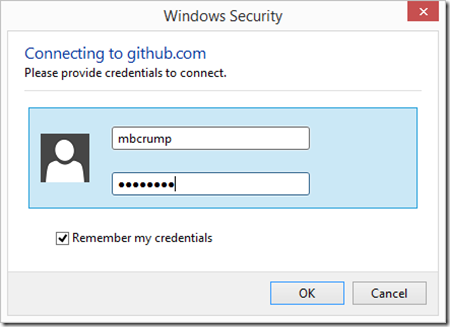
After you hit the publish button, you may need to authenticate with your Github username and password if you have not done so already.
You should see the following message:
Go ahead and hit the “Sync” button and you will see the following message:
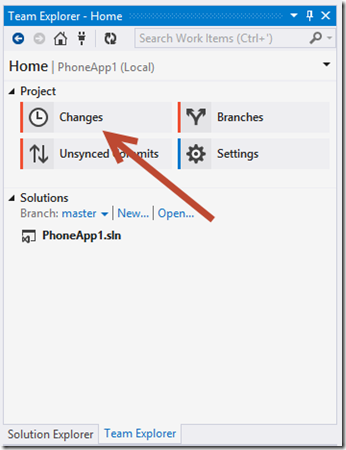
Now that your account is tied to the repository, you need to upload any unsynced commits. Select “Home” from the Team Explorer menu then select “Changes”.
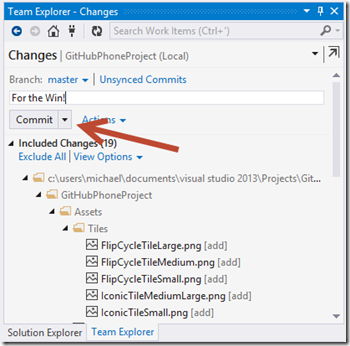
Here you will see a list of your project and all of the files to be included in the commit. Give it a description and hit “Commit”.
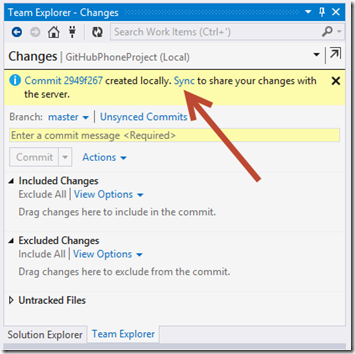
You should see now that your commit was created locally and you will need to Sync to share your changes with the server. Click on the “sync” button to do that.
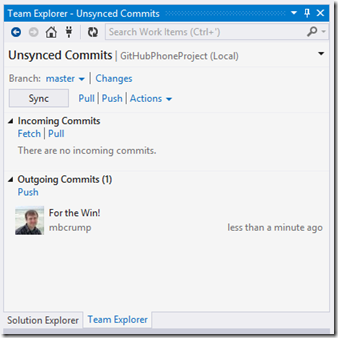
This will bring you to Unsynced Commits. Simply hit “Sync” and then navigate over to your Github.com repo and your project should be there.
Making a Change
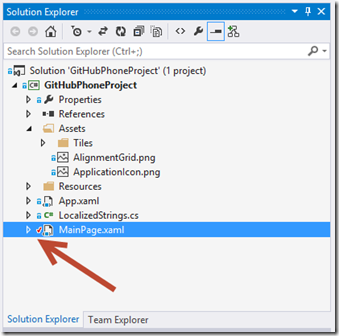
If you switch back over to Solution Explorer and make a change, you will see a red check mark on the file as shown below. A blue keypad means that it is already checked in.
Head back over to “Team Explorer” click “Changes” then enter a description and click “Commit”.
Again you will be asked to Sync with the server from your local repo, and you will need to click “Sync” again.
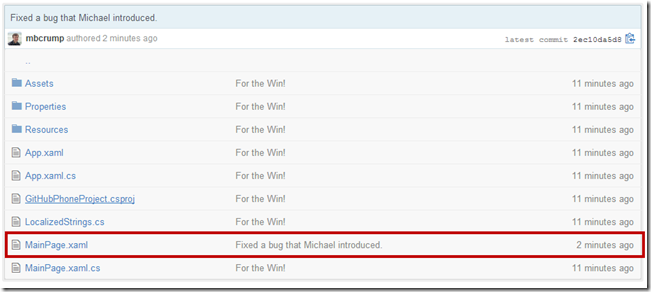
Switch back to GitHub and look at your repo and the change should be reflected.
Wrap-Up
Now in order to keep you sanity, bookmark this page and whenever you setup a new project you can use this guide to walk you through it. Because if you are anything like me, you will forget in about 6 months (I mean minutes.) Thanks for reading.
TweetFollow mbcrumpNo new comments are allowed on this post.






Comments
Mike Ward
Git integration in VS works better and faster than TFS in my experience. Haven't figured out how to branch in the IDE. Always have to exit, branch, relaunch.