A XAML Guy digs into ASP.NET MVC4 (Part 1 of ?)
Introduction
Through and through I love XAML. I love building and working with SL, WPF, WP7, and Windows 8 XAML Metro Apps. But one thing that I’m aiming for is to have an understanding of other web applications frameworks (MVC in particular). Mainly for two reasons, to become better informed and for my passion of helping customers of Telerik to find suitable web solutions (be it Silverlight, WebForms, MVC, etc). I am not brand new to MVC as I have worked with it before, but I feel that it is time for me start “from scratch” and document my experience. As I’ve said many times before this blog was created for me as a quick reminder of how I did something. If anyone benefited from reading what I wrote then that was just a bonus. If you already know MVC then you won’t get much out of this series. If you are a XAML person, and want to see what the other side looks like then stick around. I’m sure I’ll make plenty of mistakes but hopefully we can learn together.
Starting with MVC4 Beta
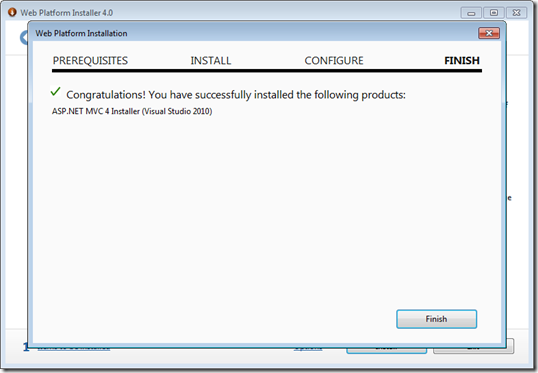
I decided to start this series with MVC4 Beta because of some of the new stuff such as Web API. I’m aware that it is in beta and MVC3 is a more stable version. Anyways, if you want to follow along then you can grab ASP.NET MVC 4 Beta from the Web Platform Installer 4.0. It installs on top of MVC3 (which you will have if you have VS2010 SP1 installed). You may also want to check out the release notes here.
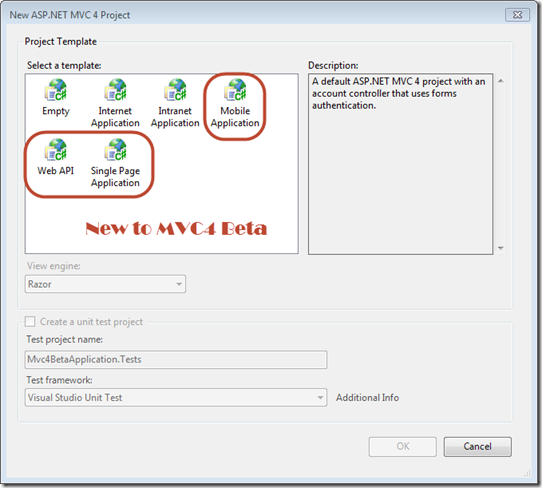
When you create a new ASP.NET MVC4 Project, then you will get the following templates out of the box. The ones circled below did not ship with MVC3. Also notice that the “Use HTML5 Markup” checkbox is not available anymore. That is because all MVC4 applications use HTML5.
What is the difference between the different Project Templates?
- Empty - An empty ASP.NET MVC 4 project.
- Internet Application - A default ASP.NET MVC 4 project with an account controller that uses forms authentication.
- Intranet Application - A default ASP.NET MVC 4 project that uses Windows authentication.
- *NEW* Mobile Applications - An ASP.NET MVC 4 project for mobile devices with an account controller that uses forms authentication.
- *NEW* Web API - An ASP.NET Web API Project
- *NEW* Single Page Application - A Single Page ASP.NET MVC 4 project with an account controller that uses forms authentication.
Start Me Up!
I am starting with the Internet Application and using the Razor View engine since that is the preferred view engine. If I hit F5 as soon as Visual Studio finishes spinning up then I see a fairly nice template to get me started.
Quick Note: The MVCContrib library contains 8 alternate view engines. Brail, NDjango, NHaml, NVelocity, SharpTiles, Spark, StringTemplate and XSLT. (source)
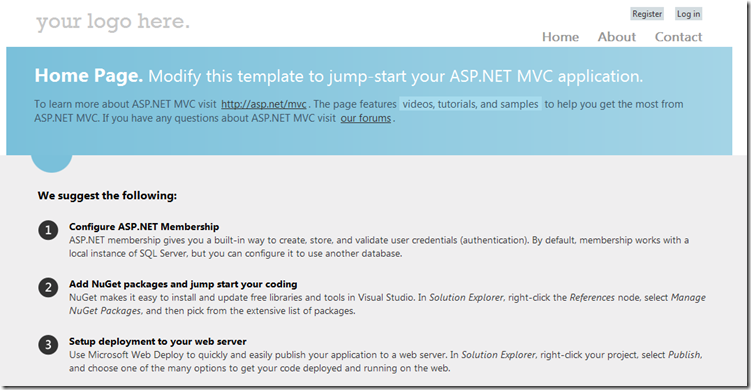
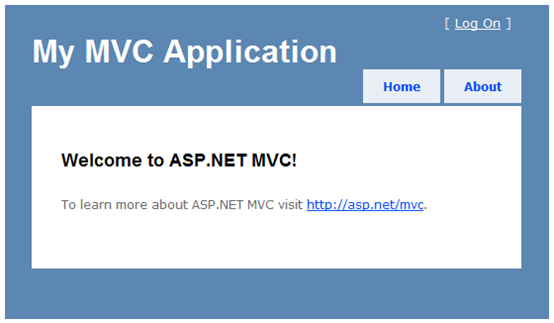
Much has changed with the default page as in MVC3 it looked like this:
Thankfully, the template in MVC4 is much better! So out of the box, we get a pretty nice template. Let’s now explore what makes up the application by jumping into the Solution Explorer.
The Solution Explorer
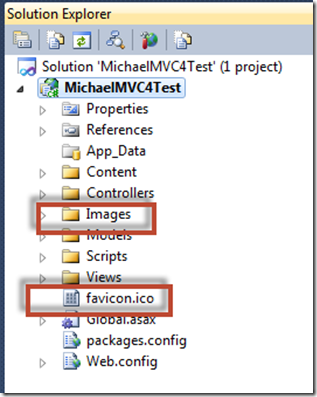
The only difference that I could tell in MVC4 Beta vs. MVC3 was that MVC4 includes an “Images” folder as well as a favicon.ico. The images folder contains the images found in the default templates and favicon.ico is of course the icon displayed when the user bookmarks your page.
I’m not going to break down the solution explorer as you can find a great write-up by Microsoft for the MVC3 Solution Explorer here.
Starting with Controllers
According to Microsoft, in an MVC based application, controllers are responsible for handling end user interaction, manipulating the model, and ultimately choosing a view to render to display UI.
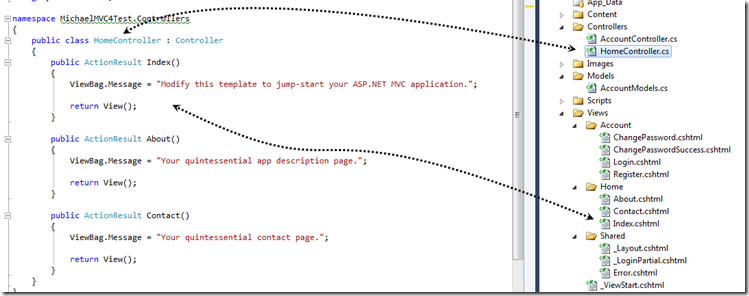
We quickly find out that the framework requires the names of all controllers to end with "Controller". That is why we see the HomeController shown below in the Controllers folder.
If we double click on that file then we can see it is class that derives from Controller. The next thing we will notice is that under “Views” –> “Home” we have three files that match the ActionResult found in HomeController.
Quick Note:
- The ActionResult encapsulates the result of an action method and is used to perform a framework-level operation on behalf of the action method.
- Razor is not a new programming language itself, but uses C# or Visual Basic syntax for having code inside a page without ASP.NET delimiter: <%= %>. Razor file extension is ‘cshtml’ for C# language, and ‘vbhtml’ for Visual Basic. (source)
So, we have taken a brief look at MVC4 Beta Project Template, the Solution Explorer and dabbled with Controllers and Views. I’m more of a do-it kind of guy, so the next step is adding functionality to our existing application.
Adding an Additional Page
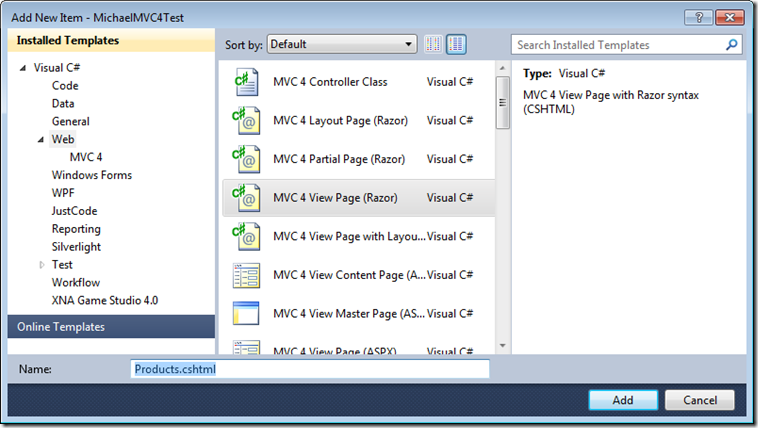
Let’s go ahead and add an additional page to our application. Right click on the Home Folder inside of View and select “Add” –> “New Item” –> and Select “MVC 4 View Page (Razor) – Visual C#”
Give it a name of Products.cshtml and you will see it generated the following code:
@{
    Layout = null;
}

<!DOCTYPE html>

<html>
<head>
    <meta name="viewport" content="width=device-width" />
    <title></title>
</head>
<body>
    <div>

    </div>
</body>
</html>
Right off the bat you can see the Razor syntax at the top with the Layout = null then you will see HTML5 markup with the famous DOCTYPE tag. *You know the one every HTML5 session says you can remember*.
We are going to remove everything and just add in the following code snippet:
@{
    ViewBag.Title = "Products Page";
}

<hgroup class="title">
   <h2>@ViewBag.Message</h2>
</hgroup>
What the heck is a ViewBag?
The ViewBag uses the dynamic feature that was added in to C# 4. It allows an object to dynamically have properties added to it.
In this sample, we are going to set a Title and use the built in title class (found from hgroup) to display the ViewBag Message which we are going to set in the Controller.
Back to Controllers
Navigate back over to the Controllers page and double click on HomeController.cs and add the following code below the Contact Method.
public ActionResult Products()
{
    ViewBag.Message = " Your quintessential products page.";

    return View();
}
Here we can see that we created a new method called Products (which matches our name in the Views –> Home) and gave the ViewBag a dynamic Message and finally return the view.
Run It!
If we run it then we will quickly find out the page hasn’t been added. That is because we need to navigate over to the Views –> Shared and modify the _Layout.cshtml
If you drill down into the header tag then you will find a list with the id of menu. Simply add Products to this list as shown below:
<nav>
    <ul id="menu">
        <li>@Html.ActionLink("Home", "Index", "Home")</li>
        <li>@Html.ActionLink("About", "About", "Home")</li>
        <li>@Html.ActionLink("Products", "Products", "Home")</li>
        <li>@Html.ActionLink("Contact", "Contact", "Home")</li>
    </ul>
</nav>
What the heck is ActionLink?
An ActionLink returns an anchor element (a element) that contains the virtual path of the specified action. (source) If you want to break down the parts of ActionLink, then look at the image below:

As you can see in our example, we are passing in the Title, The Action Method and finally the Controller Name. Notice the third parameter is Home. This will map to HomeController class.
Now if you run the application then you will get your “Products” page and the text you defined in the dynamic ViewBag.Message.
Notice our clean URL: (doesn’t have the ugly .aspx page found in WebForms)
We can now go ahead and add an additional parameter for example : http://localhost:13945/Home/Products/123456 (depending on the port number assigned to your project) and notice that nothing happened to our page. It did 404 out. Why is that? It is because we don’t have anything defined to handle the “id” that is being passed in. Let’s investigate this further by going back to our HomeController and replacing the ViewBag.Message code for the Products with the one listed below:
public ActionResult Products()
{
    ViewBag.Message = String.Format("{0}::{1}::{2}", RouteData.Values["controller"],
                                                     RouteData.Values["action"],
                                                     RouteData.Values["id"]);

    return View();
}
Now if we run that same page and enter the following URL: http://localhost:13945/Home/Products/123456 then we will get the following result:
As you can see we get the controller named Home, the action is called Products and we passed in 123456 which is the id. Stay tuned for the next part of the series as we are going to do something with the id that is passed in and explore much much more of MVC4.
Wrap-up
We covered a ton of MVC fundamentals in this first part. While nothing blogged about in this first part is earth shattering (especially if you are an MVC guy/gal) it really helped me wrap my head around ASP.NET MVC. I would recommend if you are interested in diving deeper much much faster than this series then check out Steve Sanderson’s book Pro ASP.NET MVC 3 Framework from Amazon.(not a referral link). Feel free to leave comments and suggestions below if I’m doing something wrong. Thanks for reading and until next time – Michael signing off.
The “latest and greatest” bits of all Microsoft Products can be found below.
Windows 8 Consumer Preview Download | VS11 Beta Download | Azure SDK | Azure Trial | Windows Phone SDK | WebMatrix
TweetFollow mbcrumpNo new comments are allowed on this post.


Comments
Kdc31
Excellent work Michael! Looking forward to more posts.